Hey everyone!
Yesterday, I put a post up revealing our hallway re-do! It has been one of my favorite projects in our house, and you can see it
HERE !
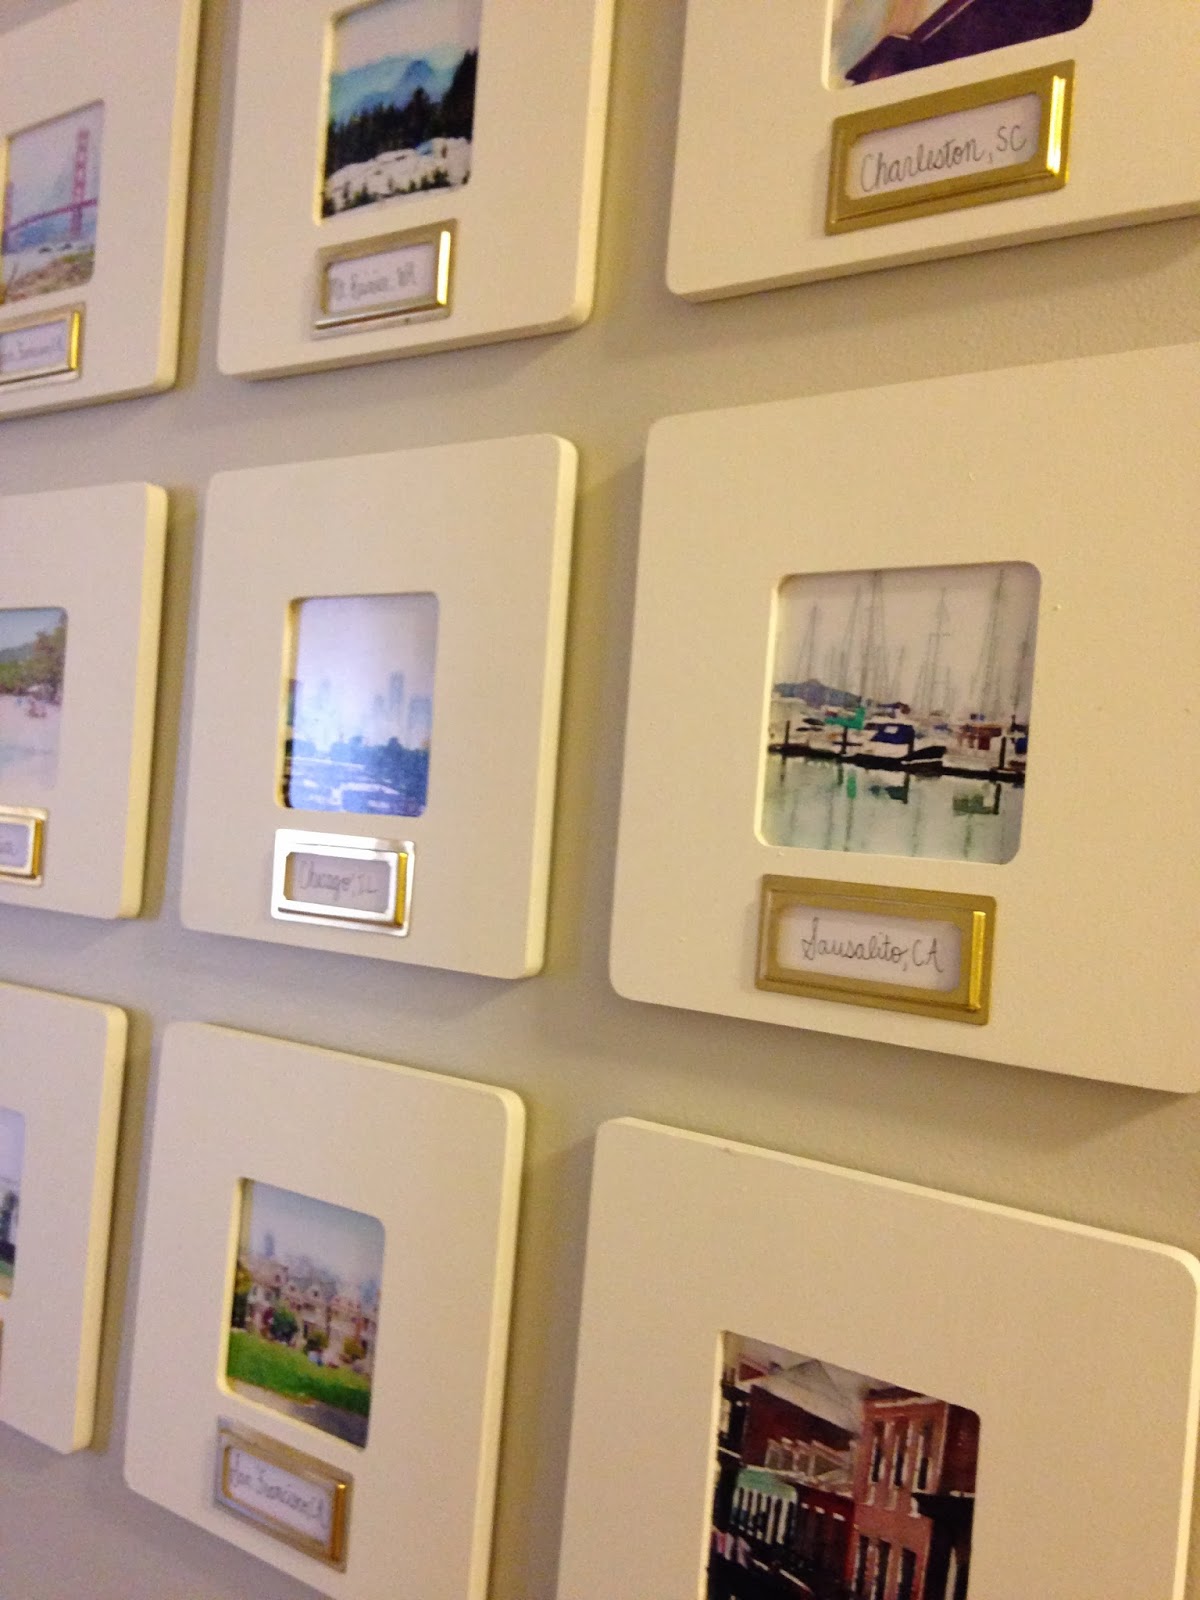
One thing that I knew I wanted in the update was a gallery wall, but not a big, typical one. I am also super anxious about putting a ton of nails in the wall, so I knew that I wanted to put up frames that were light and could be put up with just command strips. I found this app on my iPhone called Waterlogue, and I am completely obsessed! It takes your photographs and within a minute turns them into a beautiful watercolor. There are different filters that you can use to tweak them, and if you are using a good quality picture than the end result is also good quality and if you want to get prints made.
I have made about 50 different watercolors with different photos I have taken, but for this gallery wall I had 12 prints made. I want to show you some examples of the before and after...
This picture that I took on our trip to San Francisco and it is one of my absolute favorites. It has the "Painted Ladies" houses in the front and the skyline of the city behind it. The picture is beautiful, but it doesn't even do it justice to the real thing...
Here is what Waterlogue turned it into....
This picture I took when we were close to the Golden Gate Bridge in San Francisco...
And the after....
I love this picture that I took of Chicago's skyline...
And I absolutely love the way that it turned out...
This one is a picture I took in Charleston, SC while I was on a boat going under the bridge. I love it so much!
This is what Waterlogue turned it into...
Here are the rest of the 12 pictures that I chose for my gallery wall....
This is in New Orleans...
Mt. Rainier in Washington...
This one might be my favorite. It is Seattle's skyline. I took some great pictures that trip...
Sausalito, CA...
The White House...
Whitehouse, Jamaica on our honeymoon...
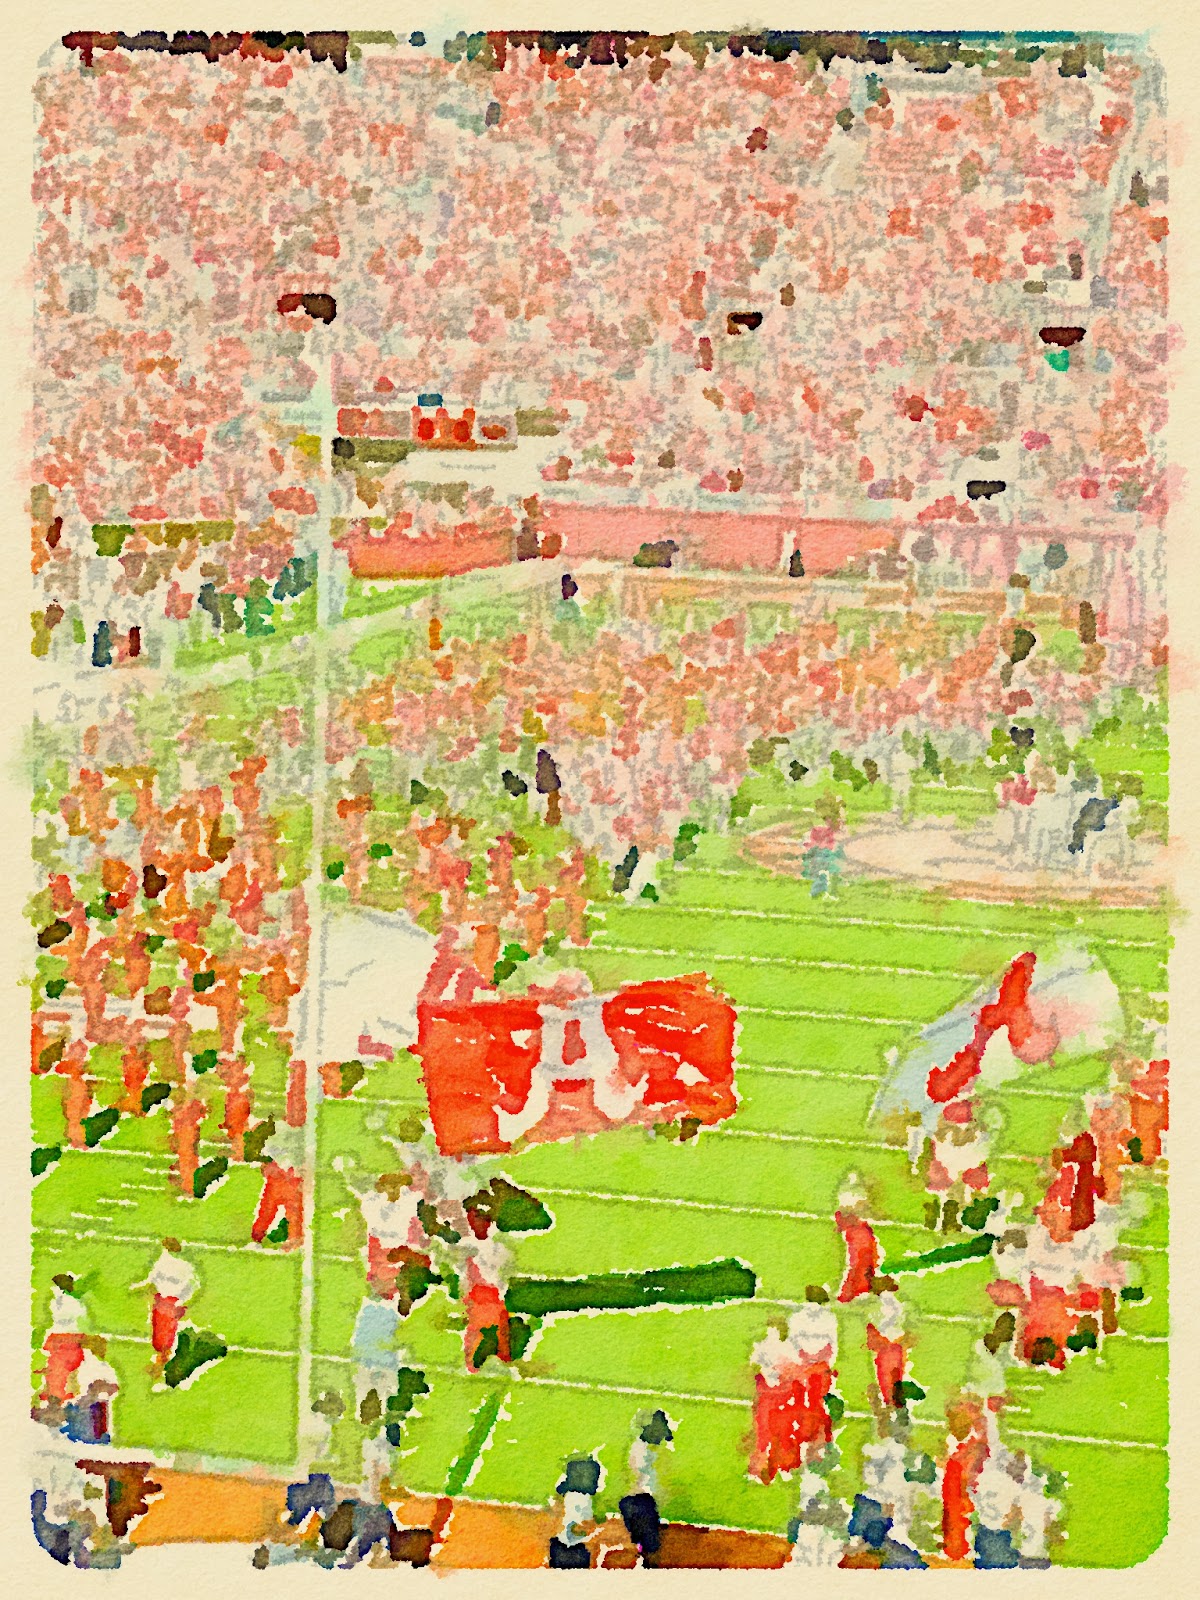
Bryant Denny Stadium in Tuscaloosa, AL where we went to college...
Hot Springs, Arkansas where Justin's grandmother lives...
When I decided what pictures I wanted to use for my gallery wall, I did some research on good places to have them printed. Since they have the watercolor look, I knew that I wanted the option of a matte finish and they needed to be 4x4 to go in the frames I wanted to use. I decided to use Postal Pix, and it was very easy. I just downloaded the app on my iPhone, uploaded the pictures I wanted, and picked the size and finish I wanted. The total for the 15 prints I ordered was a little over $5 and they arrived at my house about a week later!
So, onto the frames that I chose. I found these unfinished wood frames from Michael's for $1 each. They are perfect; light weight, they have a square opening, and you can customize it by painting it whatever color you want...
I painted them white with a sample size paint that I had on hand from Home Depot. You can get sample sized paints for a few bucks and it is plenty for this project!
Here are my pictures after I got them in the mail!!! I was so happy....
I laid them out on my floor to see what order I wanted to put them all in, and I was so happy with how the colors popped so much against the white frames...
I decided to add a little bit more bling bling to them. I got these gold label holders from Staples. They were a little pricey at $4 for a pack of three which was a little more than I wanted to spend, but I couldn't find anything else that I really liked.
The label holders have a sticky back and easily sticks to the frames. I then wrote on each frame where the pictures were taken....
I love knowing that as the years go by and we go on more cool trips to new places I can switch out the pictures and labels easily without having to add new frames!
I love the way that it turned out! You could easily do the same thing with instagram pictures as well. It is a great way to add some color to any gallery wall and to make it your own!
Here are some more pictures that I created with Waterlogue....
I really love this app, and I am so happy how my gallery wall turned out!!! Hope you enjoyed looking at my creations!!