Showing posts with label Our Home. Show all posts

Friday, April 4, 2014

Navy Blue Buffet Redo!

Hello out there!

So lets dive on in!
We have been blessed since we got married that our families have gifted us a lot of furniture which has been awesome because we have not had to spend a lot of money to make our first house a home.

So, today I wanted to share probably my favorite piece of furniture that we have because it is so special. My mother in law gave it to us in December, and I absolutely love it. This buffet was actually bought by her father who Justin has always admired and looked up to so much. He bought it and since then it has worked its way down from Justin's mom to me and it is just so special for me.


I made a little gallery wall in our living/dining room (which I just realized I never blogged about...ekk) Anyways..... I love that I put it where I did because as soon as you walk into our front door if you turn your head to the left you see it. I love having it in a spot for us to see everyday as well as when people come over. So, here is the set up before...

One of the things I love most about this piece is that it has two sides that I can easily pop up to have more room to put more food on if we need it. I love that it is different than a lot of buffets that I have seen, and the shape is amazing. I also love that it has drawers, but is still open at the same time!


So, I devised my plan on what I wanted to do and gathered my supplies...
I knew that I wanted to make my own chalk paint which I had done before and I loved the result. So I needed...
  • Fine grit sandpaper and a sanding block (optional)
  • Zinsser white primer
  • Angled paint brush
  • Plaster of Paris
  • One sample size container of the paint color I chose
  • Empty container with a lid to mix my paint
*There is a foam roller in the picture that I thought I might use, but I didn't like the way the paint looked so I didn't end up using it in the end.

I decided that I wanted to paint it navy blue because I wanted to have some color, but I didn't want to do anything too out there; I was really going for a timeless look because I love this piece of furniture so much. I chose Blue Spell by Behr...


I only needed a sample size because I knew that I would be priming it before I painted


So, my first step (after removing all of the hardware) was to sand really quickly in all of the nooks and crannies of the piece. I have found that wrapping a sheet of sandpaper around a sanding block really helps this go faster, and its much more forgiving on your poor fingers.


Here is what it looked like after the sanding step. Really, I just spent maybe 5 minutes quickly sanding; it doesn't have to be perfect. Make sure that after you sand you clean the piece really well before you prime.


Now I know that one main reason people us chalk paint is to avoid having to use primer, but with this piece I really wanted it to be as close to perfect as I could get, so I didn't want to take the quicker route. Here is what it looked like after one coat of primer...


And then I did one more coat of primer....


While the last coat of primer was drying I went ahead and mixed up my chalk paint. You will need Plaster of Paris (which is not expensive at all, and I will last you FOREVER), the paint color that you choose, and water. I have found that mixing it in a plastic container with a top that you can get at Home Depot or Lowes is awesome because you can store any left-overs you have, and you will need a paint stirrer.

For this sample size of paint I mixed 3 tbsp. of Plaster of Paris and 2 tbsp. of water with the paint. Always remember to add a little and then if you need more water you can add, but you can't take it away! One recipe that I saw said 2 cups paint, 5 tbsp. Plaster of Paris, and 3 tbsp. water.
You want it to still be a paint consistency, but a little thicker. It is okay to have a few clumps, but not too many. Just make sure to mix it really well.

Here is what it looked like after the first coat of chalk paint. I was getting nervous because it looked much more bright blue than the deeper navy color I was going for and I got extremely nervous.


At this point it was dark outside so the lighting isn't the best, but here is what it looked like after two coats plus one small coat of touch ups where I needed it.


The last step after everything is dry is to wax which serves as your "sealer" After you use the chalk paint on a piece of furniture it literally feels like a chalk board and it is not fun to touch, and it is very easily scratched. So, I used this wax that I got from Home Depot in the "Natural" color so it didn't alter the paint color in any way. All you do is apply it with a rag or old (clean) t-shirt, let it sit and set for about 15-20 minutes. Then, take a clean rag or tshirt and buff it. It definitely gets your arm workout in for the day!


The next day after it was all dried and waxed I put the hardware back on and started styling; which of course is the most fun part!!!
Here is the final product....


This is the view that you have from the front door when you walk in and look to the left...


All of the things that I used to style it with I already had in different places around my house so I just went shopping in different rooms and moved stuff around. So yay for not spending money that I didn't need to!

I love the drawers in this buffet too! I love the top drawer with it's dividers for serving utensils. It is amazing...


And the bottom drawer now holds all of my table runner, placemats, and napkins!


One last look..........


And there you have it guys! I hope that you enjoyed today's little makeover, and maybe get inspired to try making your own chalk paint for yourself!!! 

Wednesday, March 19, 2014

My closet...errr office update!


Hey everyone!

Today I want to share my little closet/office makeover! In our three bedroom house we have turned the smallest bedroom into a home office/small gym. In one corner we have our cycling bike and small exercise equipment area that we added not too long ago. You can see that post HERE. In the opposite corner we have our computer desk set up where Justin mainly sits; it has our printer and file cabinet over there as well.
So when we were moving in and figuring out what we were going to put where I had a big dream of an amazing craft room... I know that I am not alone out there! Realistically speaking I knew this was going to have to remain a dream and with the help from my mom and some inspiration from Jen at IHeart Organizing We made a plan to turn the closet in our third bedroom into a space for me! 

Here is what the closet looked like when we first moved in...

So, this room is where we keep our Alabama décor, so naturally my first thought was to make my little closet fit with the rest of the room. Here is what we started with....


I love my alma mater, but I have been itching for a change. I wanted to bring in some fun colors, and make my space a little bit more glamorous! Take a look at what it looks like now...


My wonderful glass desk is actually a console table that my mom spotted at an estate sale we went to right after we bought our house back in 2011. She had the vision that it would be the perfect size desk for my closet, and like always she was right! I love having a glass table because it makes the area feel even more open and not so cramped, but to top it off it was only $10!


My mom also helped me figure out a smart way to store my fabric because I have a TON! I got this sweater organizer for all of it, and it works perfect!


Since this is a closet, lighting isn't exactly perfect. I have needed a lamp in here for a while, and I decided on this LED bankers lamp from Home Depot. I really love it, and it is the perfect size.


I got this antique brass tray and bumblebee dish this past weekend when I went antiquing in Tennessee! The flower arrangement is from TARGET, and my diffuser is from Marshalls.


I got this cute little journal as a gift, and I just love it!


My bulletin board is really a square canvas covered in a gold polka dot napkin. At Christmas time I saw a set of gold polka dot napkins at Marshalls, but I decided that I didn't really need them. Well, I went back a few weeks ago and now in March they were on clearance! YAY! So, I took one of them and covered my canvas with it using spray adhesive...


I made the three pictures with an app that I love and use all of the time called Rhonna Designs. I use this app a lot with my blog and Instagram pictures. I just love all three of them, and lets face it we all need to know that there will be miracles!


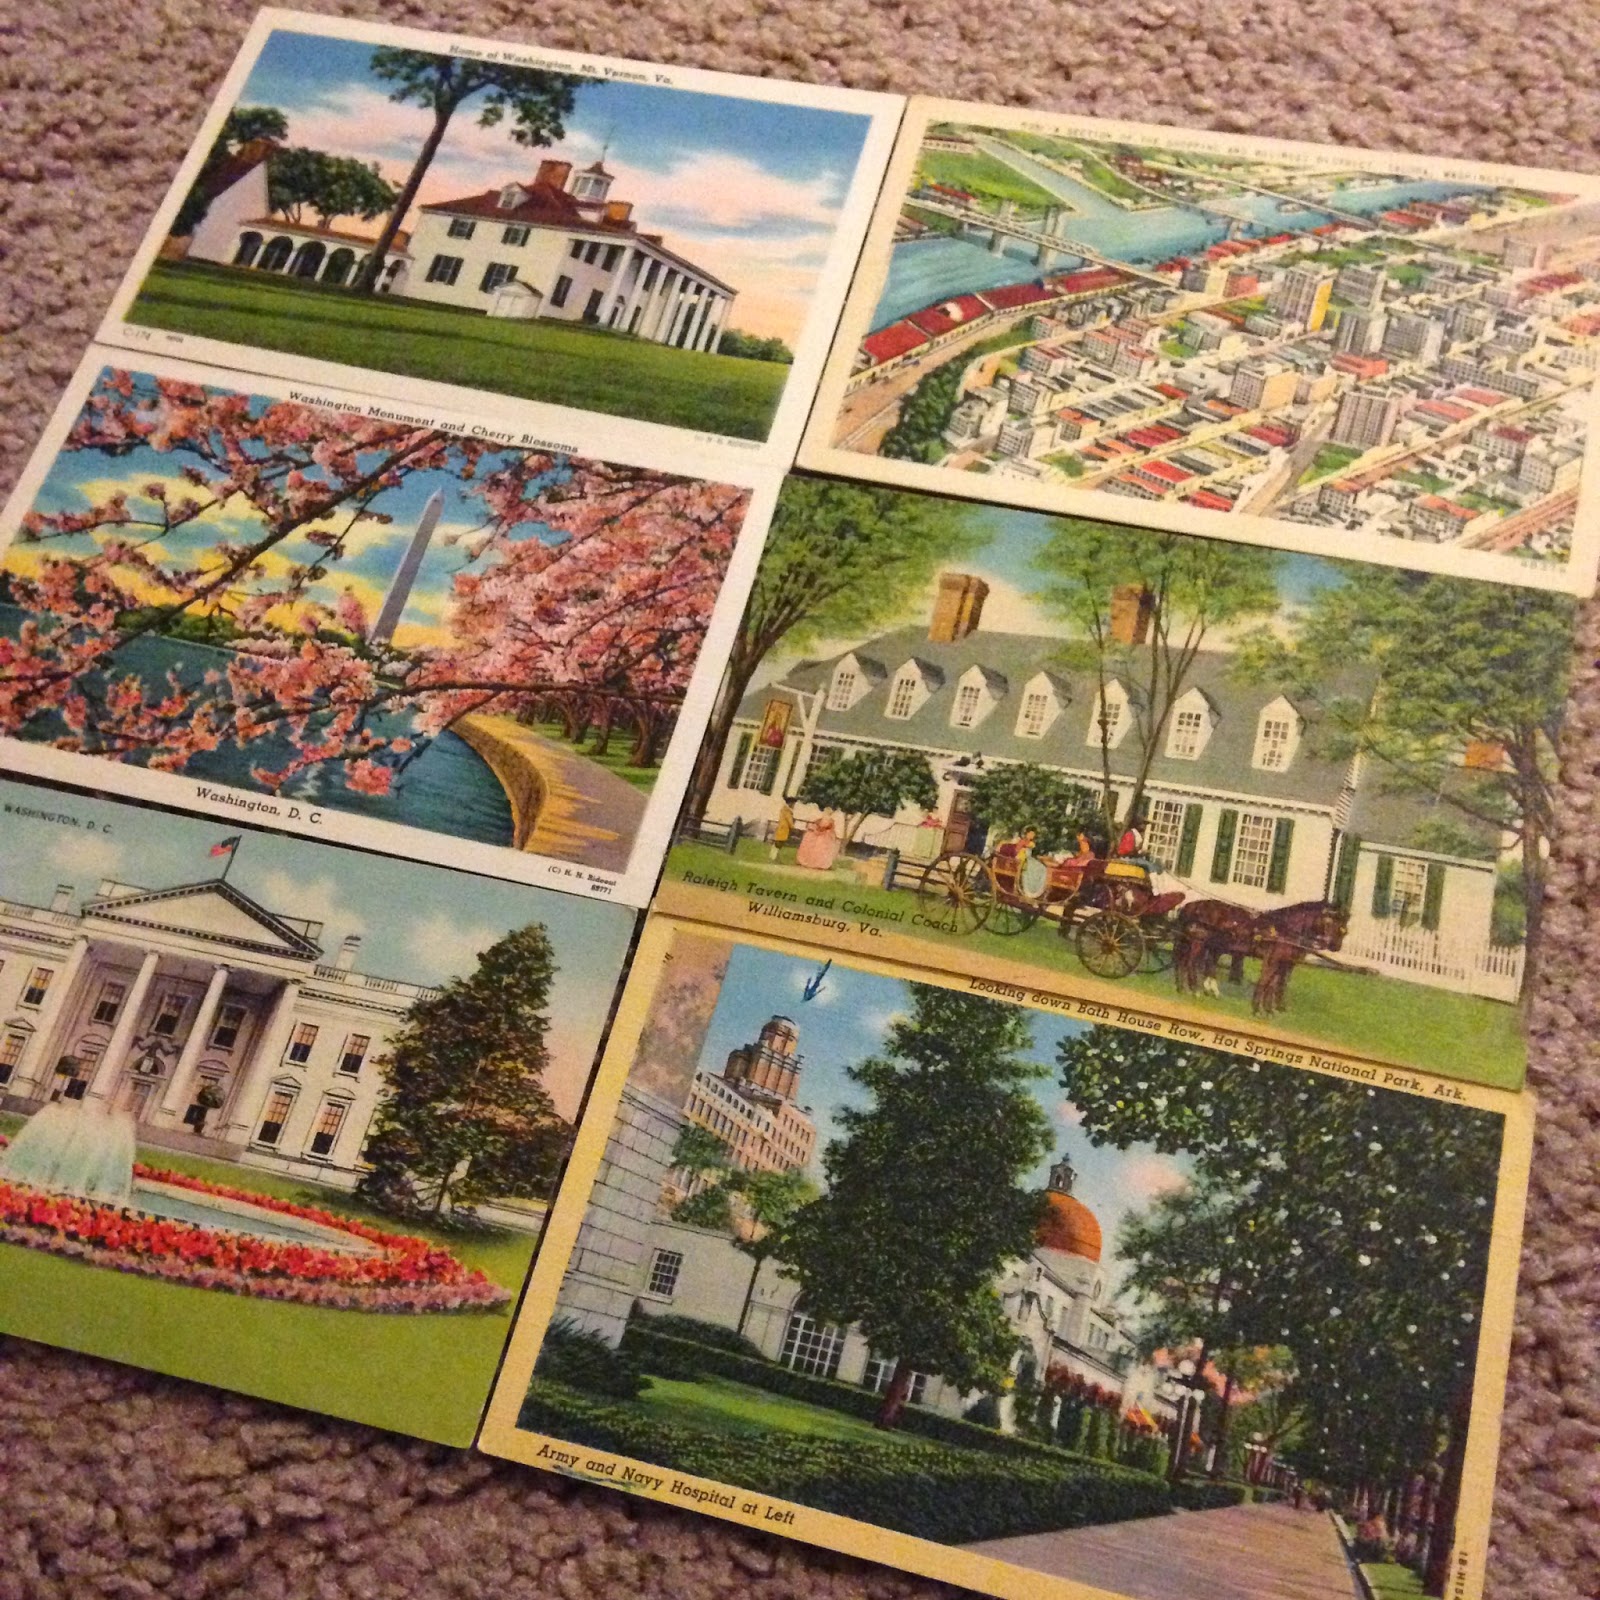
I also got these vintage postcards while we were antiquing in Tennessee. What is so neat about them is they are all places that I have traveled to. I love how vibrant the colors are!


I have little things in these drawers like label holders, paper clips, a mini stapler, tape, etc. I didn't really know what to put on the labels, so I decided to put 4 of my favorite bible verses just for fun!

For the shelf above the closet I got these photoboxes for $1 each a few years ago at Michaels. I have always used them in here, but I revamped the labels and I love the way they turned out!


Here is one last look at the finished product! I hope that you like the change!

Tuesday, February 25, 2014

Hallway Gallery Wall using Waterlogue


Hey everyone!

Yesterday, I put a post up revealing our hallway re-do! It has been one of my favorite projects in our house, and you can see it HERE !

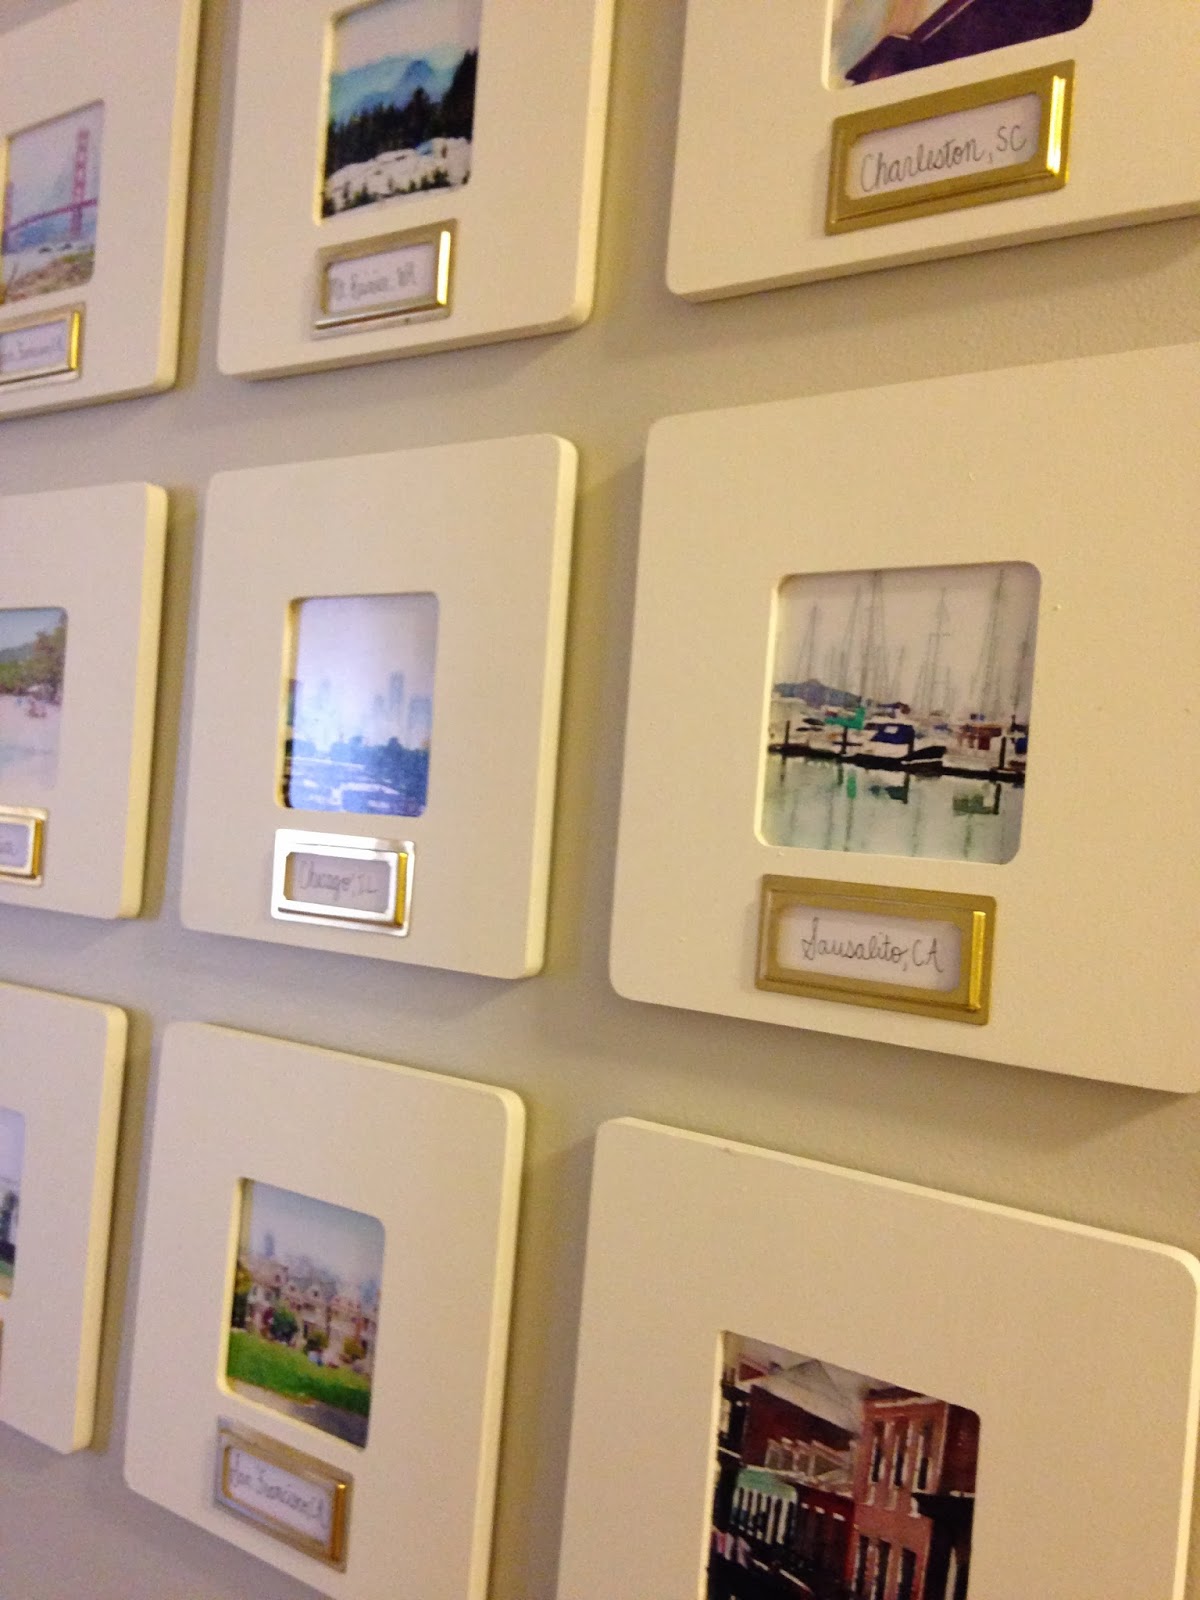
One thing that I knew I wanted in the update was a gallery wall, but not a big, typical one. I am also super anxious about putting a ton of nails in the wall, so I knew that I wanted to put up frames that were light and could be put up with just command strips. I found this app on my iPhone called Waterlogue, and I am completely obsessed! It takes your photographs and within a minute turns them into a beautiful watercolor. There are different filters that you can use to tweak them, and if you are using a good quality picture than the end result is also good quality and if you want to get prints made. 
I have made about 50 different watercolors with different photos I have taken, but for this gallery wall I had 12 prints made. I want to show you some examples of the before and after...

This picture that I took on our trip to San Francisco and it is one of my absolute favorites. It has the "Painted Ladies" houses in the front and the skyline of the city behind it. The picture is beautiful, but it doesn't even do it justice to the real thing... 

Here is what Waterlogue turned it into....
This picture I took when we were close to the Golden Gate Bridge in San Francisco...


And the after....


I love this picture that I took of Chicago's skyline...
And I absolutely love the way that it turned out...


This one is a picture I took in Charleston, SC while I was on a boat going under the bridge. I love it so much!
This is what Waterlogue turned it into...


Here are the rest of the 12 pictures that I chose for my gallery wall....

This is in New Orleans...
Mt. Rainier in Washington...


This one might be my favorite. It is Seattle's skyline. I took some great pictures that trip...

Sausalito, CA...


The White House...
Whitehouse, Jamaica on our honeymoon...


Bryant Denny Stadium in Tuscaloosa, AL where we went to college...

Hot Springs, Arkansas where Justin's grandmother lives...


When I decided what pictures I wanted to use for my gallery wall, I did some research on good places to have them printed. Since they have the watercolor look, I knew that I wanted the option of a matte finish and they needed to be 4x4 to go in the frames I wanted to use. I decided to use Postal Pix, and it was very easy. I just downloaded the app on my iPhone, uploaded the pictures I wanted, and picked the size and finish I wanted. The total for the 15 prints I ordered was a little over $5 and they arrived at my house about a week later!


So, onto the frames that I chose. I found these unfinished wood frames from Michael's for $1 each. They are perfect; light weight, they have a square opening, and you can customize it by painting it whatever color you want...

I painted them white with a sample size paint that I had on hand from Home Depot. You can get sample sized paints for a few bucks and it is plenty for this project!


Here are my pictures after I got them in the mail!!! I was so happy....


I laid them out on my floor to see what order I wanted to put them all in, and I was so happy with how the colors popped so much against the white frames...


I decided to add a little bit more bling bling to them. I got these gold label holders from Staples. They were a little pricey at $4 for a pack of three which was a little more than I wanted to spend, but I couldn't find anything else that I really liked.


The label holders have a sticky back and easily sticks to the frames. I then wrote on each frame where the pictures were taken....


I love knowing that as the years go by and we go on more cool trips to new places I can switch out the pictures and labels easily without having to add new frames!


I love the way that it turned out! You could easily do the same thing with instagram pictures as well. It is a great way to add some color to any gallery wall and to make it your own!


Here are some more pictures that I created with Waterlogue....


I really love this app, and I am so happy how my gallery wall turned out!!! Hope you enjoyed looking at my creations!!


Follow Me!